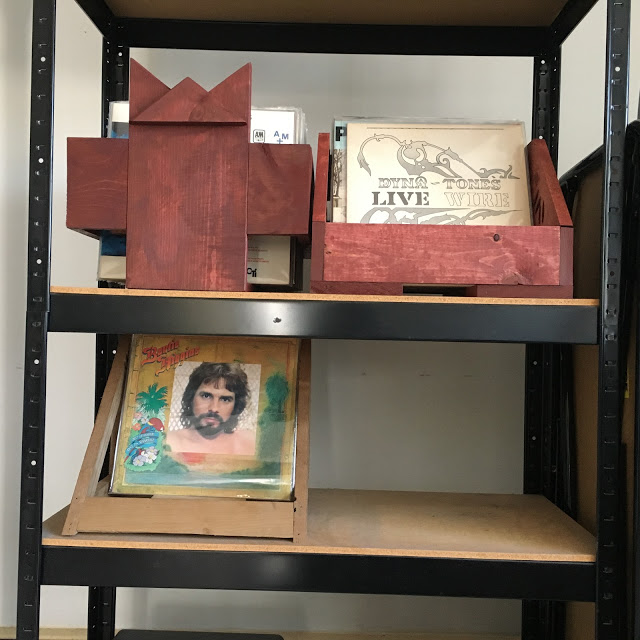
So I continued on with my journey to create four completely irregular, asymmetrical crates to be stored, two by two, on a shelf in my living room where my old television used to be, which is now in an electronics recyclery or a landfill.
With this bin, I wanted to incorporate triangles. The simplest approach it seemed to me was to use these triangles as the sides of my bin. A right triangle, specifically, seemed well suited to a record bin with the square back, high rear (to support the records) and low front (to show the jackets). I already used my chop saws capability to cut angles on my last bin so I figured this would be a piece of cake.
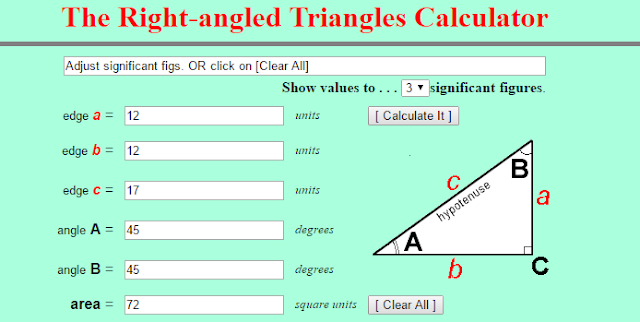
I remembered the Pythagorean theorem from high school but we only used it to calculate the edge lengths – but now I needed the angles as well. I found an online calculator rather quickly and started experimenting with it. It didn’t take long to determine that this was going to exceed my saws capacity for angles – it is limited to a 45 degree in either direction. However, shortly after that (through experimentation) I found that if edge A and edge B are the same length, both angles are 45s. So that would work just fine and I decided on 12″.
So I figured this would be a very quick project…I measured and cut my pieces then determined I had to take into account the added lengths of the connecting pieces. This is easy to calculate until you take into account edge C, where the added lengths come at a 45 degree. I’m sure there is a carpenter reading this now and laughing at how simple this is and the fact that I am figuring it out all alone. Laugh away.
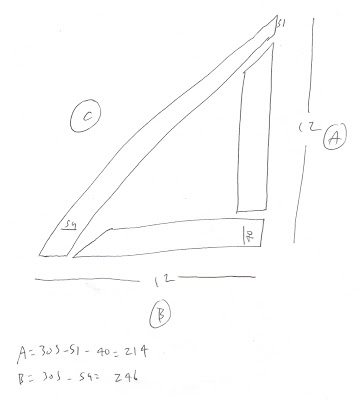
So I had to sit down and draw this so it made sense in my mind. At this point I could see already that the pieces were not fitting together very well at all, the angles were off. Or were my edges not precisely cut and that threw things off? So I switched to metric so I could measure in millimeters (I am more comfortable in metric anyways due to my occupation) and I grabbed a protractor to check my cut angles. They were off! So then I tried to fix that with a belt sander and coping saw.
After many cuts, I finally got pieces that fit together, at least well enough that I knew the screws would pull things together. But pocket holes on stock this small, plus the angles made that tough. I looked at my options and selected what seemed to be best and went to work. Finally – I had one side. Now to make another.
A short time later, that was done. Now what? I didn’t know. Again, I can’t draw in 3D so it is tough to have a ‘plan’, I just dream it then try to execute it. So I had to attach the two sides somehow, at a width of at least 13″ to accommodate LPs and their bags. So the thing that made the most sense was to put a beam across the back, down low. But I had pocket holes down there connecting the edges of my triangle. So I did it mid way up the back and figured I’d come up with something after that.
Then I was stuck. Really stuck. I couldn’t figure what to do next and I’ve never been stuck this bad before. For starters, my crate needed a bottom and I have become fond of NOT using a piece of plywood for this. I do not want any of my four crates to use anything but 1x_ stock and I’m not about to change now. But what the hell would I attach it to? I have 1×8 and 1×6 but how do I connect it.
After much deliberation, I cut my bottom and then carefully put a 45 degree on the front of it to match the angle of the front of my crate (the lower angle on both triangles). I cut it a little longer than I needed and figured I’d clean it up later. The crate also needed a ‘lip’ to hold the records when they are leaning backwards. So I first cut a piece that went across the whole front, and I used nails to attach it (2 on each side). But it was really ugly to have the exposed edges of the stock so I got mad and tore it off.
Then I figured I could attach a lip to this bottom piece, but alas, yes then it too would need to have its bottom cut on a 45 or at least roughed off with a belt sander so it would sit flush on whatever surface it is perched upon. I started with the belt sander but determined it would take a long time so again I used the sawzall to cut (rip, actually) a 45 off the bottom edge. I experimented with a few different width ‘lips’, at first considering a really narrow one (~5″) thinking that is more than enough to hold the records back, then I decided to do full width and cut it a little over so it would be tight. No way to use pocket screws for this, so I bored a screw in from each edge to secure it. This would haunt me later.
Now all I needed to do is to attach the crate bottom to the back beam. This was easily done with a short piece of stock and pocket holes on both sides to secure. This was when I realized that I had forgotten to trim the back of the crate bottom off, which was jutting out of the back. I tried a few methods to trim it off until I used the sawzall carefully (and dangerously) and cut it off, then sanded it flat.
The next morning I was disgusted with use of screws on the outside of the crate and I realized that with the tight fit, this was a great application for nails. So I removed the screws and bashed in two nails on each side.
In the end, this is more of a work of art than a functional record bin, but I don’t really need anymore record bins anyway. This is free/salvaged stock and it isn’t just general use pine (I can smell when I cut it, it’s something fancy) so I am not going to finish it with paint or stain or anything at all.